When working as a team, having a standardized branch naming convention makes it easier to explain what we’ve worked on. It also simplifies finding branches in the repository, which is very helpful when we need to revert changes. Below are some standard practices and basic rules we can follow when creating a new branch. By the way, for each new feature or bug fix, don't forget to always create a new branch from the main or develop branch.
Basic Rules
- Always use lowercase and hyphen-separated names (e.g., add-feature).
- Only use alphanumeric characters (a-z, 0-9).
- Never use consecutive hyphens or a trailing hyphen (e.g., add--feature-).
- The branch name should describe what you’re working on.
Branch types are divided into Feature Branch, Bugfix Branch, Hotfix Branch, and Release Branch.
- Feature Branch
Used for developing new features.
Branch Name: feature/<ticket-number>-<short-description>
Example: feature/0001-user-registration - Bugfix Branch
Used to fix issues during development.
Branch Name: bugfix/<ticket-number>-<short-description>
Example: bugfix/0001-fix-error-user-registration - Hotfix Branch
Used to fix issues in production.
Branch Name: hotfix/<ticket-number>-<short-description>
Example: hotfix/0001-blank-after-login-page - Docs Branch
For adding or updating documentation, you can use this branch.
Branch Name: docs/api-endpoints
After finishing our work, we usually want to merge our changes into the main or develop branch. To do that, we can create a Pull Request. When doing so, there are a few best practices we should keep in mind.
1. Keep PRs Small and Focused
- PRs should focus on a single task, bug fix, or feature. Avoid bundling multiple changes in one PR.
- Benefit: Easier for reviewers to understand, review, and test the changes.
2. Use Descriptive Titles
- The title should summarize the change concisely (e.g., "Fix login bug" or "Add user authentication").
- Benefit: Gives reviewers and team members an immediate understanding of the PR.
3. Write Clear Descriptions
- Explain what you changed, why you changed it, and how to test it. Include any relevant links (e.g., JIRA ticket, design document) and instructions for testing.
- Benefit: Saves reviewers time by making the context and rationale clear.
4. Add Tests (Base on Project)
- Include unit/integration tests where applicable to ensure your changes are stable. Ensure the entire test suite passes before submitting the PR.
- Benefit: Tests provide a safety net for reviewers and future development.
5. Follow the Coding Standards
- Use consistent code style across the project (linting, formatting, etc.). Ensure the code adheres to the team's best practices, naming conventions, and design patterns.
- Benefit: Keeps the codebase maintainable and easy to understand.
6. Review Your Code Before Submitting
- Do a self-review: Check for typos, logic errors, and missed edge cases. Ensure the PR diff is as small as possible (remove unnecessary code).
- Benefit: Reduces back-and-forth between you and the reviewer.
7. Ensure All Builds Pass
- Make sure all CI pipelines pass, including tests, code linting, and any security scans.
- Benefit: Guarantees the PR is ready for review and merges smoothly.
8. Provide Context in the Code
- Add comments in your code if anything might be unclear to a reviewer.
- Benefit: Makes reviewing easier, especially for complex logic.
9. Respond to Feedback Gracefully
- Be open to feedback and make requested changes promptly. If you disagree with feedback, explain your reasoning but remain collaborative.
- Benefit: Encourages positive collaboration and ensures a high-quality codebase.
10. Rebase Before Merging (if necessary)
- Regularly pull changes from the main branch and rebase your branch to keep it up-to-date. Squash unnecessary commits to clean up the history if needed.
- Benefit: Avoids merge conflicts and ensures a clean commit history.
11. Tag Reviewers and Be Patient
- Assign relevant reviewers and avoid tagging too many people unnecessarily. Be patient; allow sufficient time for thorough reviews.
- Benefit: Streamlines the review process and ensures the right people are involved.
12. Versioning Each Merge to Production
- Will be discussed in the next post
13. Real Case Implementation (Example with Gitlab)
In doing pull requests (PR), we can use templating. The purpose of this templating is to make it easier for us when doing the PR itself, and with this templating, developers will have a consistent structure. We can set up this template ourselves and customize it according to our needs. By the way, the setup for this templating is usually done by our lead.
Steps to use templating (Example using GitLab):
- Title PR
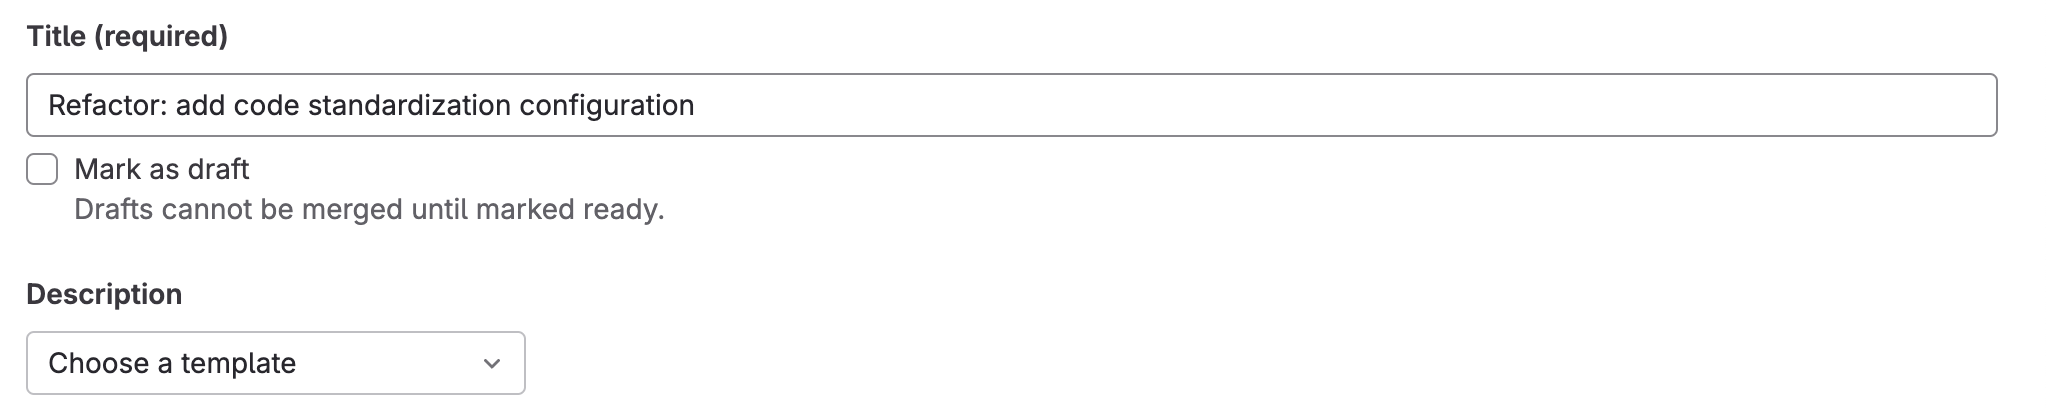
- For the Title, actually it will take from commit title, but you can customize if you need it
- When your project has a template in your gitlab, we can see have a Description and we can choose the template from that
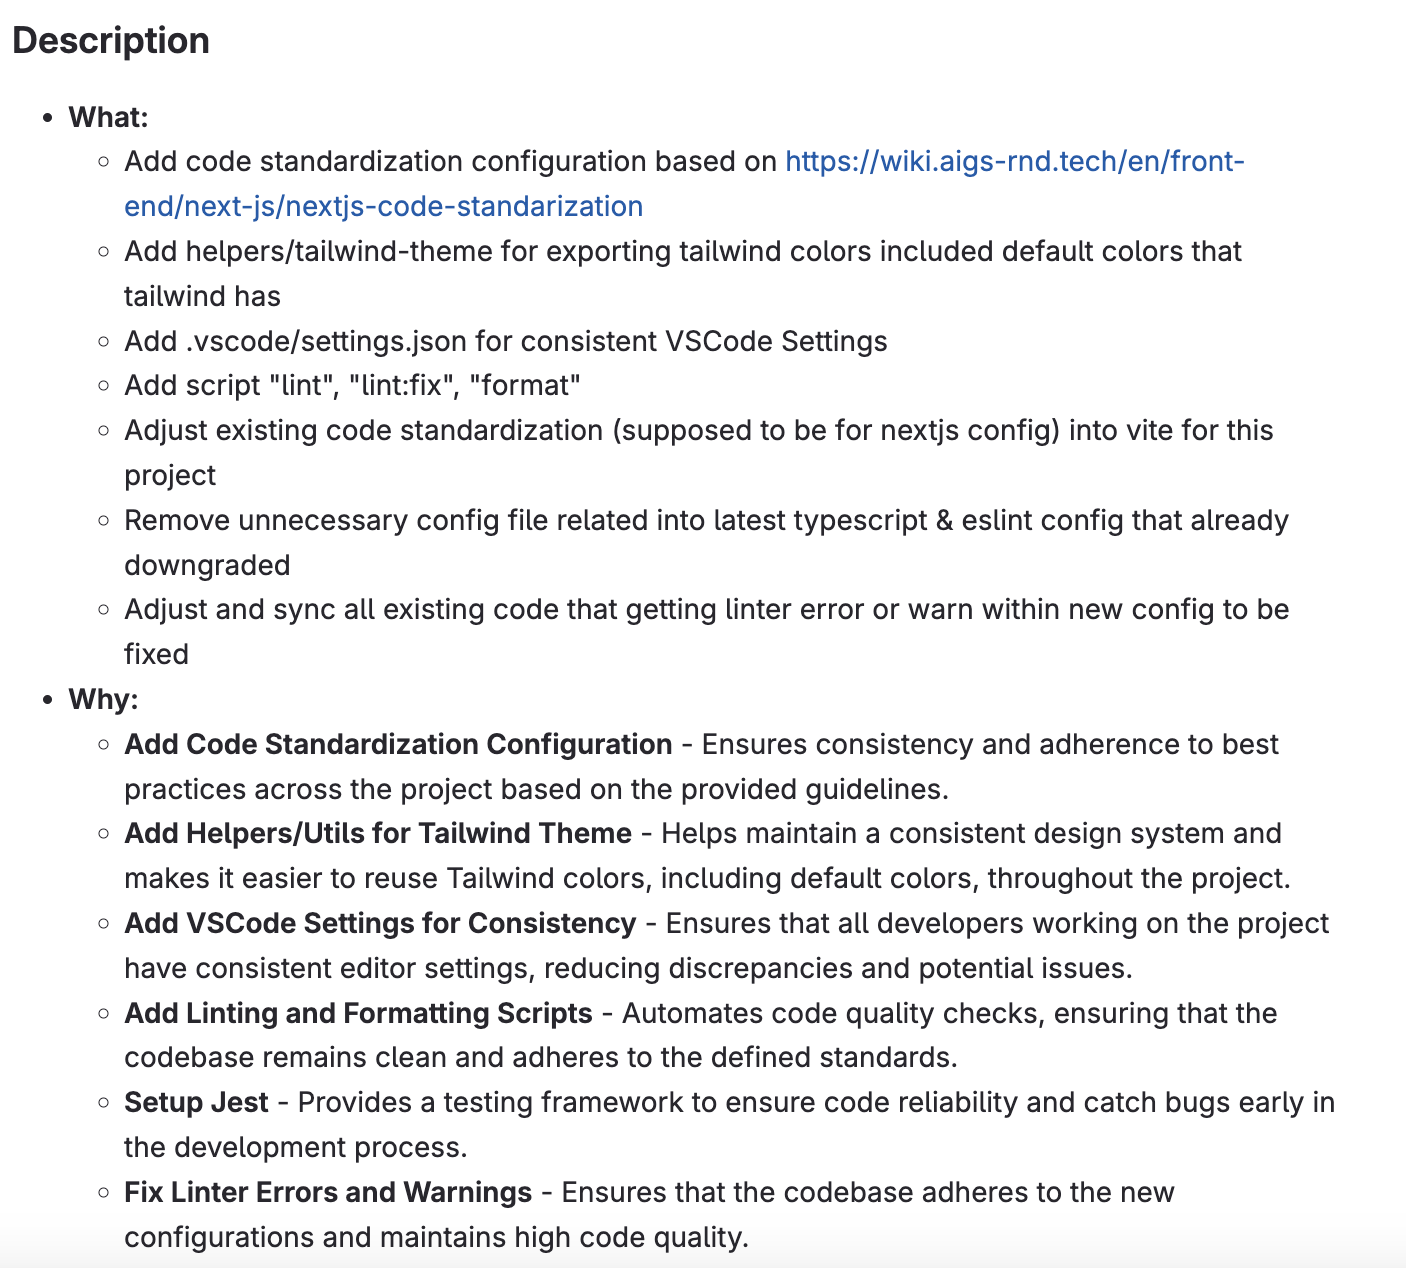
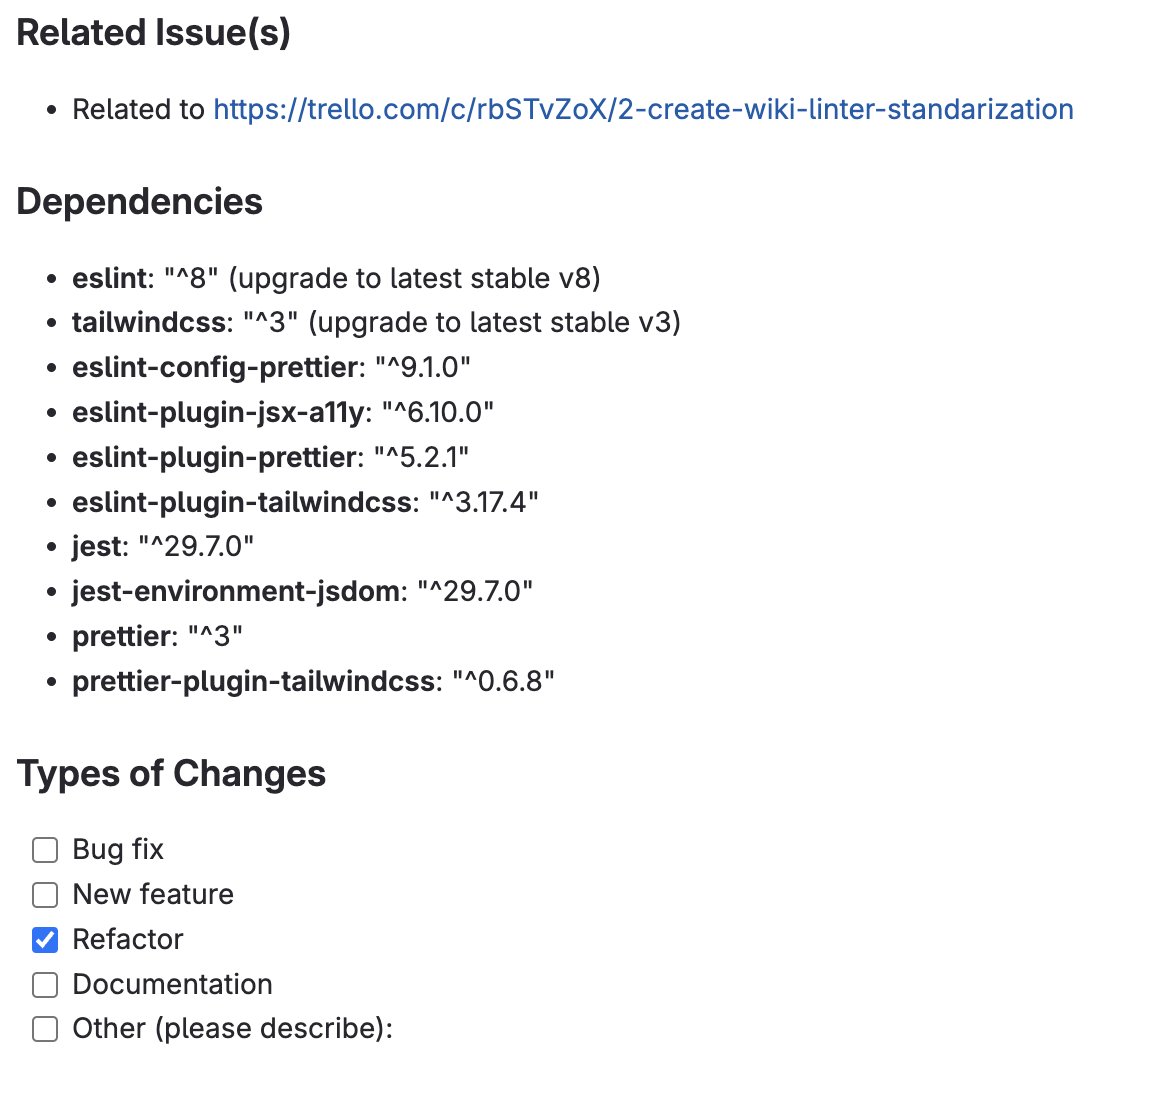
2. Select the template we have

- In this case, for template have name mytemplate, so lets use that
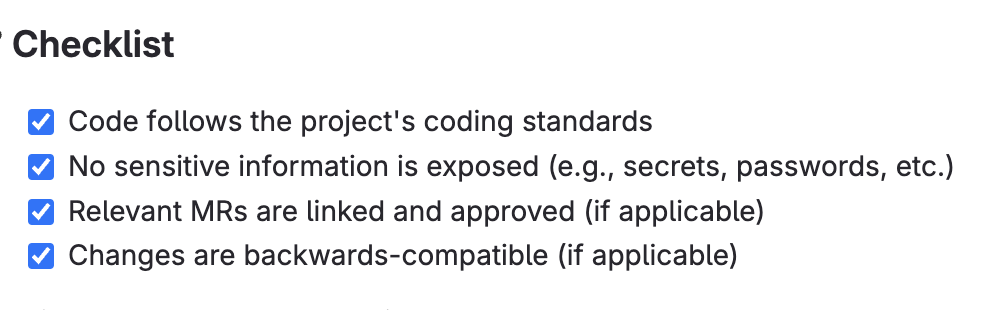
3. Default Structure

this example from structure we have, no all section we need fill, just fill the necessary section only
Implementing these best practices will make the PR process smoother, reduce review time, and ensure a higher-quality codebase. And you guys for make your day simple, you can use dependencies from vs code call branchIt ( https://marketplace.visualstudio.com/items?itemName=BranchIT.branchit )